Thursday, January 31, 2008

Perhaps...

Have I found a suitable lighting compromise?

Polling people through my previous photoshop efforts, led me to the conclusion that perhaps the top set of lights was too old-fashioned, but the bottom set was way too tall-- I even had to lower them in the photo so they fit on screen, and they still looked too tall. However, I think all liked the vertical lines. I'm still back and forth.

But maybe these are a sort of compromise:Sorry-- I didn't even begin to have the patience to get the perspective right on that cabinet. And we'll hang a towel bar from the bottom of it...That's the plan, anyway.

Wednesday, January 30, 2008

Thanks, POs, for at least this one thing!

A post this morning by Nate over at Nate's Fargo Fixer-Upper reminded me that I do have a few things to be grateful for from my POs. Nate made an awesome find of a slew of doorknobs on eBay (BTW-- has this been super-fabulous-deals-deals-deals January in blogland or what?) and it reminded me that pretty much every doorknob and hinge in our house is period. They may not all be original, but they're antique and mostly suited to the age of the house. Some are really plain brass (these are mostly on the retrofitted closets), but most of them are a mixture of crystal knobs on art deco plates and stamped brass on rectangular stamped plates.

Some of my favorites:


But it's not just the fact that they are still in the house. I don't think I've mentioned this before, but there was some panic during the bidding process. It's a small town and we do happen to know one of the previous owners (2 owners ago). The family was interested in buying back the house and they looked at it during the bidding period. They didn't end up bidding. But I did find out that while they installed some of my least favorite things in the house-- like the Berber carpet-- they took the time to remove all the doorknobs and hinges, strip them of their paint and polish and restore them. They also installed the brick patio in the backyard-- bricks that came from the street when the city tore it up ~15 years ago to put in modern paving. That was a feature that almost sold us on the house all by itself.

So thanks Previous Owners.

Sometimes, ok, a lot of the time, I bitch and moan about all the shitty things you've done to this house. But you're not one big blob of a PO-- some of you did some really nice things that I am ever so grateful for.

We owe you one. But just this one-- 'cause that carpeting was a bitch to get up.

Tuesday, January 29, 2008

A sinking suspicion we're screwed

Ha! Sorry...a "Dad" joke. I couldn't resist. You'll see what I mean...

I mentioned yesterday that we ended up with a bit of a sink dilemma when we were putting the new countertops on the cabinets. I'm hoping someone out there has some ideas (perhaps from personal experience? C'mon-- help me out; I want company in my misery).

A couple of weekends ago we put the plywood base down on the existing cabinets. Two things happened. One, is that we cut the hole for the sink so that it was flush to one side-- this left no lip of counter on which to screw our sink clips. Secondly, the vertical partitions of the actual cabinets were a little too thin in some places to really screw the plywood into place.

Our solution: One by one strips of wood. We screwed 1x1s to some of the sides of the partitions to have a base to receive the screws, and put one on the inside of the sink cabinet to create a lip. We put the sink in to make sure it fit-- it did-- and went on our way.


You can probably see where we're going with this.

After we laid out the tile for positioning, we put the sink in its hole to make doubly sure it fit and to see how it all looked.

And it looked good. Except, when I looked under the sink, I noticed that the clips seemed to be up awfully high. Adam got one out of the box and tried to hook it on. That's when we realized that we hadn't taken into account the added height of the backer board, tile, AND mastic.

We considered taking this piece out; however, its matching piece on the other side of that partition/wall thingy is screwed into it. And this doesn't solve our problem on the other side of the sink, since the actual counter is screwed into that piece. And then we'd still have nothing to clip to.

So here's what we're thinking: We looked around online for sink clip extensions or extra long sink clips-- this is where I discovered that we are NOT the only people this stupid and that no one has taken on the task of inventing such a thing. I'm adopting these as my new million dollar idea-- so don't steal it from me! We then considered fabricating something just like these clips, but longer, out of...something...metal...?

Or, we're likely to use a wood spade drill bit to rout out a space just deep enough to handle the clips.

Any solutions/anecdotes/miracles?????

Monday, January 28, 2008

Bought this light...


...for the office. $25 and not too nipply. Can't really complain.

Our Sunday ups and downs

Literally, figuratively, emotionally. The kitchen counter was probably the project we've most anticipated and most dreaded.

The day at least started out on a good foot; our screws trick worked well with the hardibacker (see previous post) and Adam started laying out the tile while I picked up my awesome laundry room floor slate. When I got back to the house, we started cutting. Instead of buying a tile saw (if we'd known we'd be tiling the laundry floor, too, we might have purchased; lessons learned, I guess), we rented a big one from our neighborhood friendly equipment rental guys; of course, we took advantage of the awesome weekend, 2 days for the price of one, rental special (~$45). I made Adam do all the cutting.

We started out with one of the chipped corner tiles as a test run for our complicated sink corner pieces...And would you believe it? We got it right on the first try!

Emboldened by our shocking and unexpected success, we laid out the rest of the counters and got all the tiles cut. Fit like a glove.

We bought the white mastic that was specially labeled for granite and marble; it also had the added bonus of being advertised as thick and strong enough to build up to 3/4". That way, we could try to work out some of the unevenness that we couldn't solve in the previous several layers of leveling. We mixed it to a pretty loose consistency and started on the left where we had the least amount extra leveling to do. We laid them up to the sink and then wiped them down with a wet rag to get rid of thinset smears. Then we moved into the inside corner of our L-shaped cabinets. This is basically the location that dictated where everything else sat on that side of the sink.

We laid those corner tile and worked to the right; but by the time we got back to the area just left of the inside corner, the first tiles we'd laid were set-- and set too low for the tile we were trying to lay. I don't know if that makes any sense, but the end result is an uneven spot that we couldn't fix. I've talked about the "Oh Shit" moment of a project; this was the, "Not much we can do about it at this point" moment. Most of our joints are pretty smooth, except for this one. I'm not happy about it, but we're not trying to fool anyone into thinking it's solid surface. Obviously that's not an excuse for screwing up, but, as I said, short of tearing up the entire counter top, "not much we can do about it at this point."

Anyway, we put the blue tape on it to keep from sliding; really we put it on there because that's what we've seen other people do ;-). I had nightmares about the tiles sliding off the counter last night and cracking in the middle of surface.

Here's the way we left it Sunday night:


Overall, I'm pretty pleased at this point. We had to trim 2 pieces in the middle of laying the tile-- some grit from the thinset had crept in between the tiles and shifted things a bit. We also have a sink issue that I'll detail later. Maybe someone can help us. Until then, I will revel in the fact that we can grout next weekend and, fingers crossed, move in by the end of February.

We'll start with backer board (and a puppy!)

Since the backer board day was so depressing, I'll start with a picture of a puppy on the porch...


He's 13, so not really a puppy...but he spent the afternoon checking out his new backyard digs and sniffing about the house. When the project got ever more tedious and tragic, I could glance out the back door and see him staring back watching us work. A happy little moment...

Ok, on to the backerboard fiasco. We spent all last weekend getting the plywood on and as level as possible. Weather kept us from getting to the house midweek, so Saturday morning was devoted to backerboard. We cut the boards-- no real problems there. Mixed up the thinset-- it looked a little thick, but we've never done this before; and anyway, the directions on the box were in Rebus puzzle, and I'm a words kind of gal. We slopped it on, laid the boards and went to lunch.


We got back, and the boards didn't really look like they were sticking very well. But we went ahead and screwed them in. Then we started laying out the tile to see where we wanted it all to go. Left of the sink looked good. Everything to the right of the sink acted like it was on a teeter-totter. Nothing was even, the backerboard wasn't sticking any better. It was all wrong. So we removed everything to the right of the sink, scraped off the mastic, bought some thinset with WORD directions, and started all over again with a better, runnier mixture.


This time we got the backerboard in place, threaded the screws part way and used them to raise and lower parts of the board until it was as even as we could get it, and then left the screws only partially in. That way, the thinset could dry right where we needed it without us squishing it around with the screws. When we did finally screw everything down Sunday morning and laid out the tile, everything rocked quite a bit less and we moved on to the scary part of our project.

My biggest deal yet and other tales of the Home Depot

So I've mentioned the bathroom wall cabinet at 30% off...the Moen shower head at 80% off...the stainless steel trashcan duo for $10...our labor day sale granite tile and appliances...our Overstock.com faucet...the chandelier on clearance...We've found some pretty good deals. Well, folks, my bestest bargain so far came along over the weekend.

I almost never shop at Home Depot-- they're a little too expensive for poor little me. But they happen to be the only people we've found that carry our base shoe in the lengths we need. So we trucked on out there Saturday night to stock up on base shoe and grab a few other odds and ends we needed for our tiling project (which will get its own very special post, ugh.) and happened upon...


That's 92 square feet of Rajah slate bought at the reasonable price of $0.49/ft2. And it doesn't stop there. Remember I got a little tip that Lowes would be putting a lot of stock on 50% off clearance? After we got that information, we decided to put the search for laundry room flooring on hold for a while, at least until we had a chance to view the upcoming bargains. But when I saw this big stack of tile, I counted it and found that there was much more than the 77 ft2 that I need. I am NOT an impulse shopper, so I had to "sleep on it." Except that sleeping on it meant that before we even got to the car I decided I'd come back the next morning. So I did. And the flooring guy who loaded it up for me said that there 90 tiles, plus 2 broken ones (there were a few more broken tiles than that, but I can use them for edges if I have to) so he only charged me for 84 tiles. I can't even get nice ceramic tiles for that, and I certainly can't get half decent sticky tile at that price. It'll be more work, but I'm so happy.

Now, on the not so nice side of our trip to the depot...We needed about 20 lengths of base shoe. We see the station with a big sign that says, "CUT IT YOURSELF," in all caps, just like that. We think, "Great, we don't have to find someone to do this for us." Well, let me say that the sign should read, "Cut it your DAMN self." It is a tiny ass little hand saw. That kind of ridiculousness gets old after 5 boards, much less 20.

But the slate made it all ok. And the tiling guy was actually very helpful and seemed knowledgeable-ish. Overall, a good shopping weekend. The actual tiling project, however, is another story entirely.

Friday, January 25, 2008

And the tiling begins

Well, it technically begins tomorrow. Tonight, we have to brave the mountains-- bridges, tunnels and overpasses-- and the forecast of wintry mix (it's like party mix, but with ice...and it makes me angry) to get to the house so we can complete our hardibacker installation and begin tiling. At least we apparently have more than twice the necessary amount of granite (partly due to our own overage calculations, since we're bound to screw up, and partially due to a mixup elsewhere that resulted in our favor ;-) ), so we've got a ton of room for the inevitable problems. And then leftovers for an island.

I've reserved the tile saw from our rental place and I'm ready to do this thing. Hopefully this weekend will be more productive than the last.

Either way, thank god it's Friday...

Thursday, January 24, 2008

Apparently, this is an addiction

I had to proctor the pilot version of an exam yesterday, and when I got into the room, I realized I'd left my book and other work elsewhere. But, I'd brought a laptop in so that I could closely watch the time (my watch is very fancy and very chic which means you can forget about trying to use it for actual time telling). So I hopped on the wireless network and took a look at which other houses are cropping up for sale in my hometown...just for fun...And I was seriously tempted. Really.

There was a beautiful turn of the century (1901-ish) what I would guess is a foursquare-- looking at the house it had very square symmetry, dormers in the third floor attic, and a shed roof, a broad front porch, and colored glass surrounding the front door; 2500 ft2 with 5 bedrooms and 2 baths. The ad said "finishing repairs" still needed. Now, we all know that's an understatement. But it did seem to have lots of original trim and so much going for it. And with it costing next to nothing, I almost jumped. And then I thought that I must be insane! All I've done for 6 months is bitch and moan about just wanting to move in, and just wanting to live in a halfway finished house for the first time in my life, and just wanting to have a weekend for myself.

But truthfully, after 6 months of literally being able to do little else-- I don't know when the last time I read a book was-- I can't imagine not working on a house. And I wonder if I'll ever be able to leave this house having put so much of ourselves into it; but I also see how people just keep doing this, house after house. It's a little like dealing with kids who are troublemakers. Sometimes, you can see so much potential in them and you just want to bring it out.

So this temptress house...it's in a part of town that I'm not sure is the best, really; but it's not the worst. And god knows the cost of this house isn't much anywhere. But it's certainly not unheard of here. The situation is this...

This town was at one time the western-most point before entering "Indian Territory," so it was a relatively booming "border town" for a while. And then, being on the Arkansas River, and in the 20th Century on a major interstate, it became a manufacturing and transportation center. So it's big boom was mostly the latter half of the 19th Century into the 1920s...then again in the 40s. Then, manufacturing jobs became less desirable and in turn less abundant. And so the heart of the city-- street after street after street of Italianate, Queen Anne and Folk Victorians and Craftsman Bungalows and Foursquares, from simple to elaborate, fell into disrepair and are now the cheap dumpy housing (mostly; there are luckily some very well-maintained pockets, like the neighborhood we are in). In any other city, these neighborhoods would be historic districts; even though we have such an official district, it's small and surrounded by sketchy areas.

This is combined with the fact that we never had the housing burst that the rest of the country did, or that even Northwest Arkansas did-- they've seen housing prices as much as treble over the last 10 year or so...but in the River Valley, I'm still seeing houses Adam and I looked at a year ago still on the market and priced 20 or 30 thousand dollars lower, and 1/3-1/4 the cost of homes less than an hour north. At one point, we saw an Italianate-ish house in horrible disrepair, completely gutted, but absolutely gorgeous for 30k. We considered it too, but we hadn't really committed ourselves to redoing a house yet, nor did we want to live in a transient neighborhood-- there are 2 boarding houses within a block. That's right. Not apartment complexes; boarding houses.

It's been nice that my family has always been able to afford older, character-filled houses. And it's been nice that my friends and I were always able to rent these same historic homes...However, it wasn't so nice that we were stupid kids, bored in a dying manufacturing town with nothing better to do than get drunk and trash the places we lived in. I never appreciated that these little dumpy bungalows were as great as the big Victorians-- they're everywhere here. I mean there are miles of them in every direction.

My hope is that one day, someone else will want to improve these neighborhoods-- someone with a little more to invest than me-- and that I can get in there somewhere with all my good old sweat equity. Right now, we have a 10 year old and so we bought a house in the best neighborhood of older houses that we could get into, one of only a few locations here, so we really had specific needs in a neighborhood. It breaks my heart driving through town, though, and seeing what's become of these houses and their neighborhoods. I want these places to remain affordable-- beautiful houses shouldn't only be for the rich, but sometimes they need some TLC.

I guess what I'm getting at here is that I'd love to renovate them all! So if this temptress house goes down in price, as it might seeing as how it appears to be a foreclosure, and even the grand old (affordable) houses here are sitting on the market for many months, if it does indeed go down significantly, I'd be willing to do it.

Now I can see what happens when my unmedicated obsessive compulsive streak goes unchecked. I'll be so bogged down in house repair. I can only hope that I'll reach the fed up sick and tired phase here sooner than later. I know it's coming. It just needs to hit before I spend more money.

Monday, January 21, 2008

Deals, deals, deals


Looks like progress, right?

Well, I think the bargain shoppers out there will know what I'm talking about here...You know when you're shopping at places like TJ Maxx a lot, and you get some really great deals...after a while, you realize you have a totally skewed view of the appropriate pricing for anything. $10 for a shirt starts to sound like waaaay too much. You could get one on the clearance rack at TJ for $2.

Maybe I'm stretching it here, but after several weeks of what seemed like steadily moving progress, this weekend felt like a $10 shirt. In reality, I know we got a lot done; but relative to the last few weeks, it didn't seem like much of a deal. We only got done about 1/4 of what we wanted (plywood and hardibacker installed and base shoe cut and installed), and about 1/2 of what we deemed our bare minimum (plywood and hardibacker). I think we had some delusions of DIY grandeur.

Anyway, while waiting for Adam to get to the house on Saturday, I managed to get one coat of paint on the bathroom walls; the second coat was finished on Sunday after he left to get the kiddo back to her mom's house. At first, it went on very, very red, and all I could do was say, "Oh shit, oh shit, oh shit." Don't really know why it worried me-- it's just paint. But it turned out to be a very nice color match. I love it.


Then we made the trip to Lowe's for all our countertop supplies. We left with some great inside info, so take note if you've got a tile project on the horizon: the girl at the counter said she overheard the guys in flooring say that they'd be putting a lot of tile on sale soon-- 50% OFF!!-- to make room for new product. I'd resigned myself to sticky vinyl in the laundry room in the interests of money and time. But now that I know I could get a good deal if I just wait, I'll probably keep an eye on the tiles.

The countertops were a nightmare that I'm not going to detail too much-- basically, the cabinets and the plywood and the floors were all uneven in their own special ways. Lots of shimming, screwing, unscrewing and the addition of a support beam in the far corner, finally got us to a point where we feel at least ok with the levelness and evenness of the plywood underlayment. But that, including cutting out the sink and adding supports for the sink clamps and supports for the plywood to screw into, took a long time. We didn't really have time left to install the Hardibacker. Hopefully, we'll get to it later this week.

This morning, I really had no energy for major work. So I went shopping! For house things, of course. Sales everywhere, people, I'm telling you: every place I went had great bargains. The best was the stainless steel step trash can I bought for $10! It was dented, but it took me 5 minutes to even find the ding; and it included a mini can for the bathroom.

Then I spent some time filling nail holes in our trim. They look diseased now.

So that's the progress. Looking back at it, it seems like we actually got a lot done. We're just back to projects where we don't know what the hell we're doing. Guess we just got a little spoiled.

Tuesday, January 15, 2008

Fun with Photoshop

My dad used to dream of the day when we could just literally Photoshop the world around us. Hole in the wall? Grab that rubber stamp tool! Dead limbs on the tree? Lasso and cut!

Anyway, we're not there yet, but...really...so close.***

I can't decide between 2 very different lights for the bathroom and, even thought the bathroom isn't painted, and the mahogany-walnut colored cabinet isn't in place yet, I was able to see into the future!

Well, you know, a very ragged, badly dropped-out, cut-and-paste sort of future:


***Note:Wall color? All wrong. It will be closer to color of dark tile. Size and position of lights? I used what used to be there as a guide. In other words, likely all wrong as well. Brownish-red blob on the right will be the new cabinet. Shut up-- I'm working with a dumbed down limited color palette.

More kitchen decisions

Well, today Adam is plugging away at the particle board countertops, I think. He's down there working, at any rate, and that's our next project.

We're going to need all the help we can get with the granite tile counters, though, so I've been trolling the internet looking for How-To's and Tips.

I found this Reader's Digest article with a lot of detailed info and pictures. And we've already received some tips from Jennifer at Tiny Old House-- much thanks!!

I'm also working my way through the counters section of the 10k Kitchen Remodel blog. The problem I'm running into here is that we're using 12" square tiles and he used much larger rectangular ones, I think. We're also not bullnosing the edge, but rather will choose wood trim to match the cabinets...

And speaking of cabinets, we're also considering new doors. We currently have the red oak standard stock cabinets you can get at any big box store, with that yellowy finish and raised panel doors. They're just not really my style. And, I would have loved to do dark cherry cabinets, but dark cabs, dark counters and medium to dark floors might be a bit too much, even with our bright yellow walls.

So. When we sanded the upper cabinet bases, we found that they are a nice pinkish color naturally-- the "red" of red oak, I suppose-- so we're choosing to clearcoat. As for doors, I found this company: Advantage Cabinet Doors. At $5.25 a square foot for oak, they are wicked cheap, and they carry the shaker style recessed panel doors that I like. They also come unfinished, so we could use the same thing on them that we use on the base. Anyone out there heard of them or used them before? They're cheap enough that I think I'm willing to give them a shot!

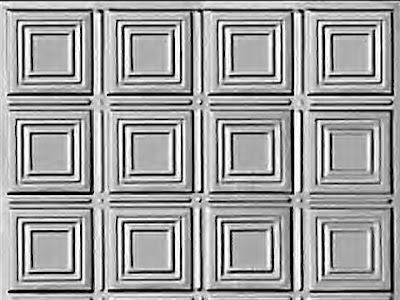
Also, I think we're leaning toward this backsplash from M-Boss:


We just have to decide whether to order it already clearcoated or whether to buy it in the mill finish and go through the coating process ourselves...My understanding is that we'd have to oxidize it fist in lye??? If anyone reading this has done it before, I'd love a recap of your experience, and whether you think it's worth doing it... It's a difference of $6.50 uncoated vs. $11.25 coated per panel, and we need around 10 panels if we just do the backsplash area, another 6 or 8 if we decide to fill in the space behind the stove.

I think the shiny aluminum will be a nice way to bring everything together. It will work with the Silver Mist appliances and reflect the green and gold of the Uba Tuba and yellow of the walls.

I might be getting a little ahead of the game here. We should probably focus on one thing at a time, but sometimes, I just can't help myself!

Monday, January 14, 2008

Then again, the best laid plans...

I had a little delay getting started yesterday. Once I got going, I decided to strip the remaining block of wallpaper above the toilet, then I could paint the bathroom, paint the kitchen, and slap one more coat of poly on the kitchen floor on my way out.

Those are small rooms. Simple plan, right?

I should know better.

The wallpaper peeled right off, at first. About 15 minutes into my project, I decided to document this ugly stuff for posterity:


2 1/2 hours, one spray bottle of water, 3 different paint scrapers, one box cutter, one smearing of joint compound, a half a roll of paper towels, and an overuse of the f-word later...


Ta-da!


So I didn't end up having time to paint the bathroom...But on a more productive note, I got one more coat of poly on the kitchen floor, and a coat of Yellow Frost on the kitchen walls:


Now we begin work on removing the particle board countertop, installing plywood, and finally installing the granite tile...Any tips here will be especially welcome, particularly involving laying out the 12" squares!!!

Saturday, January 12, 2008

I love it when a plan comes together.

This jetlag business has its benefits; I was up, showered and dressed by 7 this Saturday morning. And our early start yielded a lot of good results.

We chose our base shoe and found the cheapest price.

We picked a red paint for the bathroom: Spanish Tile from Lowe's Valspar red tinted base colors. Also narrowed it down to 2 yellows for the kitchen. We got quarts of each and tested them. I've been left to make the final decision, which I believe will be Yellow Frost from the Waverly Home series at Lowe's. Perhaps tomorrow will yield pics of some painted rooms...

We got the remaining top kitchen cabinets hung:


There's still A LOT that we couldn't solve here...one cabinet simply has to hang a bit lower than the others. Hopefully, we can hang one set of doors a bit lower and one set a bit higher so there's not a huge discrepancy in the door heights.

We got the floor gaps filled; we investigated the kitchen floor crack and it is not NEARLY as bad as I expected. It seems to expand and contract with the weather and isn't something we really need to worry about. Knock on wood.

Then, while wandering around Home Depot pricing base shoe, we found a wall cabinet for the bathroom on clearance (!!!) and I ran across two $35 wall sconces at Lowe's that I like almost as much as the $85 ones from Rejuvenation. Well, with the $100 difference taken into account. I'm still talking myself into needing them in the first place. I just have a completely irrational hatred of the existing bathroom lights.

And last but certainly not least, we MOVED the first van load of our crap.


Now we're getting somewhere.

Yuck!

This stuff is gross...


But it's also miraculous.

See, we have a lot of baseboards that look something like this:


Somebody took off the baseboards and didn't really get everything quite straight when they put them back. This created a number of gaps, up to 1 1/4" between the baseboards and the floor. When there was carpet, it wasn't so much of a problem. Now without it, I can see grass outside through some of these cracks. I like to wave and say hi to the outside when I walk by.

Now. A smart person would simply remove the baseboards and lower them to match the floor and square up with the corners. However, a smart PO wouldn't have done this:


(Excuse the sloppy paint-- we're not done with the trim, yet) So...they didn't bother to remove the baseboards to do the drywall, they just went up to the tops of the boards and stopped. Sigh.

Anyway, just one of the things that has to be added to the list of stuff we can't control. I simply don't have the energy or time to REdrywall the whole house. So we used 5 cans of the expandable spongy goo to fill the gaps. When it dries, we'll trim it and install a base shoe-- actually, a door casing that has a profile mimicking that of the primary baseboards.

I've begun reminding myself that we are the POs for all future owners; they'll be shaking their heads about all kinds of things that we've done out of frustration, exhaustion, and as a consequence of everything that's come before us.

At least now we won't be bleeding money through the floors by running the heat pump with one giant crack running around the entire perimeter of the house.

Friday, January 11, 2008

Oooh, shiny!


Tonight we will choose: a pale yellow for the kitchen...

a red for the bathroom to match the dark red tiles.

Also, while killing time in Lowe's after collecting all these lovely paint chips, I stumbled across a Moen 7 function shower head, originally priced at $50+, now on clearance for $12.50.

Sold.

Monday, January 7, 2008

Back to work

Well, for me at least. Adam finished putting the final coat of poly on the floors this week. I've been in London with my sister, so I just saw the final product this morning. I think they look great. He tells me that there's a crack in the kitchen floor, where some of the boards move. I couldn't see it, but maybe that's just because I hadn't had my coffee yet.

Now, before we move in, we need to:
-secure the kitchen floor boards so there's no more cracking
-put the final coat of poly down on the kitchen floors (It got an extra coat of shellac, so it's one step behind)
-paint the kitchen and
-reinstall and paint the kitchen trim so that we can...
-install the appliances
-begin the kitchen counters and secure the cabinets so that we can...
-begin finalizing the plumbing in the kitchen
-install base shoe over the gap between floor and baseboard and paint the trim in the rest of the house (no more drafts cooling the floors whilst the heat pump works overtime)
-finish packing 10 years worth of accumulated stuff and cleaning 10 years worth of accumulated grime

And I think that's our list for moving in. It's my new year's resolution, I guess. I don't mind working on the kitchen after we move in, but I want to have the appliances available to use. We're broke enough as it is, so we don't need any more excuses to eat out. Replacing the trim is going to be a chore-- the sheetrock is a different thickness than the plaster and lathe, meaning we'll have to trim and shim and jockey the old pieces into place. And with a gas stove and a fridge with a water line hook up, it kind of needs to be done before the appliances are put into place. Or at least, it'll be a ton easier if we do it before. Things like refinishing cabinet doors and some of the countertop tiling can wait. We have a rolling butcher block cart that can suffice as counter for a bit. I was also a little worried about the poly cracking on the kitchen floors, but to be honest, there's so much going on there, that's the least of those floors' problems. We ended up just shellacking over the water stain-- it made it somewhat darker, and it's totally obvious, but I think once we get our island in place and the dark counters installed-- and with all the nail holes and linoleum stains and the runner I use in front of the sink and...well, there's just so many problems, that in the end it seemed silly to worry about the a water stain, albeit a huge one, in an overall "rustic" floor. We'll probably put down thresholds in the doorways to demarcate the kitchen as "different" and "special."

Embracing the Crazy in this house.

Anyway, now that I've had a week away from the house and some general vacation time, and a chance to actually miss this project, I'm ready to get back to it.

Onward and upward, I suppose.

And Happy New Year, everyone!